Hey there, I’m Jake—been working with spot welding machines for over a decade, first as a tech on a factory floor, then now as part of a team that supplies these machines to all kinds of manufacturing outfits, from small metal fabricators to big automotive plants. One of the most common questions I get from new operators or shop owners is: “How do I actually adjust the spot welding parameters on this thing?” It makes total sense—welding isn’t just cranking dials until two pieces of metal stick together. Get the parameters wrong, and you end up with weak spots, spatter, even damaged parts. Last month, I had a customer call me panicking because their welds were cracking on 16-gauge steel brackets they make for outdoor furniture. They’d been using the default settings from the machine, which worked for thinner sheet metal, but when they switched to thicker stock, everything went south. By the end of our call, we’d tweaked three key parameters, and they had solid welds by the end of their shift. That’s exactly why I wanted to break this down simply, no overly jargon-heavy stuff, just what actually works in real workshops. Spot Welding Machine
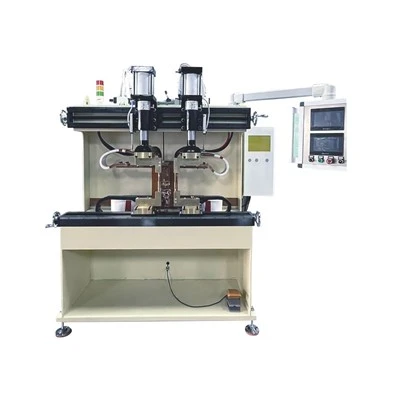
First, let’s start with the basics: what are the core parameters you adjust on a spot welder, anyway? Most modern machines have four main levers—wait, not actual levers, usually digital displays or control knobs—but they’re: weld current, weld time, electrode force, and hold time. Some machines also have a squeeze time, which is how long the electrodes take to touch the metal before current kicks in, and that’s super important too. You can’t just dive into adjusting these blind, though. The first rule I always preach to new operators is: know your material. Are you working with mild steel, stainless steel, aluminum, galvanized steel? Each of these has wildly different conductivity, melting points, and how they respond to heat. For example, aluminum conducts heat way faster than mild steel, so you need more current to get the same weld, but too much and you’ll blow through the thin stock. Galvanized steel has that zinc coating that melts at a lower temperature, so you have to be careful not to burn through that before the base metal fuses. I can’t tell you how many times I’ve heard about operators forgetting about the zinc on galvanized parts and ending up with porous welds that fall apart in a month.
Let’s go step by step, starting with the parameter that gets the most attention: weld current. This is the amount of electrical current that flows between the two electrodes, heating the metal until it melts and fuses. It’s measured in amps, usually on a digital readout or via a dial that corresponds to material thickness. The key here is that more current doesn’t always mean a better weld. For thin material (like 20-gauge steel, which is common in car door panels), you don’t need a ton of current—usually around 8,000 to 10,000 amps. But if you move to 12-gauge steel, that jumps to 12,000 to 14,000 amps. The mistake I see all the time is operators cranking the current up to the max because they think that will make the weld stronger, but that just causes excessive spatter, burns through the material, and wears out your electrodes way faster. The way to nail current is to do a test weld first. Grab a scrap piece of the exact material and thickness you’re working with, clamp it just like you would on the actual production line, and set your current to what the machine’s default suggests, then adjust 500 amps at a time. If the weld is too small (called a “nugget,” that’s the fused core you’re aiming for), add a little current. If there’s big spatter or a hole in the metal, turn it down. Last week, a small HVAC shop I supply was having trouble with their condensate drain pans—they were using 18-gauge stainless steel and had their current set too high, so the edges were burning. We dropped it by 1,000 amps, did a test weld, and the spatter stopped, and the nugget was perfect.
Next up is weld time. This is how long the current flows through the metal. It’s usually measured in milliseconds, which sounds tiny, but it makes a huge difference. Think of weld current as how hot your stove burner is, and weld time as how long you leave the pot on the burner. High heat for a short time or lower heat for a longer time—both can work, but you have to match it to the material. For thin materials like 20-gauge, weld time is usually 100 to 200 milliseconds. For thicker stuff, like 10-gauge, it’s 250 to 400 milliseconds. If your weld time is too short, the metal doesn’t get hot enough to form a proper nugget, and you end up with a weak weld that breaks when you touch it. If it’s too long, you’re wasting energy, wearing out your electrodes, and again, risking burning through the material. A trick I use for adjusting weld time: once you get the current right, leave it set, and adjust the time. Start at the minimum for your material, do a test weld, and if the nugget is too small, add 50 milliseconds at a time. If you start seeing burn-through or excess spatter, cut it back. I also always recommend doing a cross-section test every once in a while—you can take a sample weld, cut it in half, and look at the nugget under a magnifying glass. It should be a nice, uniform shape, not too small, not leaking out the sides.
Now, electrode force—this is the pressure the two electrodes apply to the metal parts before and during welding. It’s probably the most underadjusted parameter I see, and it’s actually one of the most critical. If your electrode force is too low, the metal parts don’t make tight contact, so the current can’t flow evenly, leading to inconsistent welds, spatter, and even arcing (that little blue flash you don’t want near your workpiece). If the force is too high, you squeeze all the molten metal out from between the parts, so you end up with no nugget at all—just two pieces that are pressed together but not fused. For most mild steel, the right electrode force is around 200 to 300 pounds, but that changes with thickness and material. Aluminum, for example, needs lower force than mild steel because it’s softer, usually around 150 to 250 pounds. The way to check electrode force is simple: if you don’t have a built-in force gauge, you can use a spring scale. Attach it to the moving electrode, pull it until the electrodes are just touching the metal, and see what the scale reads—just make sure to do this when the machine is off, obviously. When you adjust electrode force, it pairs with weld current and time, too. If you increase current, you might need to increase electrode force a little to keep the heat in the right spot. That’s the feedback loop I always tell operators about—parameters don’t work in isolation.
Hold time and squeeze time, I lumped these together because they’re often adjusted in tandem. Squeeze time is how long the electrodes are touching the metal before current is turned on. This is super important because it lets the electrodes seat properly, get consistent pressure, and squeeze out any air or debris between the metal parts. If you skip or shorten squeeze time, you’ll get inconsistent welds because the pressure isn’t steady when the current starts. For most jobs, squeeze time is 50 to 100 milliseconds. Hold time is how long the electrodes stay pressed against the metal after the current stops. This lets the molten nugget cool and solidify under pressure, so it doesn’t crack as it sets. For thin materials, hold time can be short, like 10 to 20 milliseconds, but for thicker metal, you need 50 to 100 milliseconds of hold time. I had a customer a few months ago making heavy-duty trailer frames from 8-gauge steel—they were skipping hold time entirely, so their welds would crack within a week of the trailers being used. We added 75 milliseconds of hold time, and that problem vanished completely.
Now, let’s talk about common mistakes I see new operators making, because even if you know the parameters, little slip-ups can ruin everything. First, not cleaning electrodes. Weld spatter builds up on the tips of your electrodes over time, and that acts like an insulator, so you need more current to get the same weld, and the heat gets uneven. I tell every customer to dress their electrodes after every 50 to 100 welds, using an electrode dresser or a flat file. If your electrodes are pitted or worn down, that’s a whole other issue—you might need to grind them to a flat, even tip or replace them entirely, because worn electrodes throw off pressure and current distribution.
Another big one: not testing settings before running production. I can’t stress this enough. So many operators just grab the default settings from the machine’s manual, which is fine for thin mild steel, but if you’re switching to a new material or thickness, you need to do test welds on scrap first. Last year, a custom fabrication shop I work with got a big order for stainless steel parts for a food processing plant. They used the default settings for mild steel, and half the welds were weak, because stainless has lower conductivity. They did test welds on a scrap piece, adjusted current up by 1,500 amps, weld time up by 100 milliseconds, and got perfect welds. That order would’ve been a disaster if they’d skipped the test step.
Also, don’t ignore machine maintenance. A spot welder’s performance depends on being in good shape—loose connections, worn cables, or a damaged transformer will make the parameters wonky, no matter how much you adjust them. I always remind customers to do a quick check of their machine every month: tighten any electrical connections, check the electrode arms for play, make sure the air or hydraulic system (if you have a pneumatic or hydraulic spot welder) is working properly, so electrode force is consistent. A customer of mine had been chasing weld consistency for months, and it turned out their pneumatic line had a small leak, so electrode force was varying by 50 pounds every weld. Once they fixed the leak, all their welds were uniform.
Now, let’s walk through a quick example to put all this together. Let’s say you’re working with 12-gauge mild steel, the material I see used most in small manufacturing jobs. First, gather your scrap pieces, same material and thickness as production. Set squeeze time to 75 milliseconds—enough for the electrodes to seat. Start with weld current at 12,000 amps, weld time at 300 milliseconds, electrode force at 250 pounds, hold time at 50 milliseconds. Do a test weld. Check the nugget: if it’s small, add 500 amps to current and do another test. If there’s spatter, lower current by 500 amps or shorten weld time by 50 milliseconds. Check electrode force: if the metal is being squeezed out the sides, force is too high—drop by 20 pounds. If there’s arcing or inconsistent contact, increase force by 20 pounds. Once you have a solid, uniform nugget, do a few more test welds to make sure consistency stays the same, then you’re ready for production.
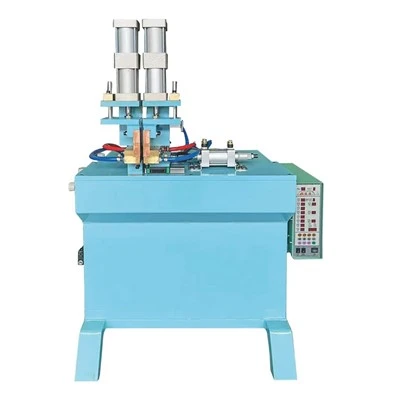
At the end of the day, adjusting spot welding parameters isn’t about memorizing numbers—it’s about understanding how each parameter interacts, and matching it to your specific material, thickness, and machine. Every shop’s setup is a little different, so the default settings are just a starting point, not a rulebook. If you’re still struggling to nail your settings, or you’re looking for a spot welding machine that’s easy to adjust and has clear, reliable parameter displays, I’m here to help. We’ve worked with everything from small hobby shops to large automotive facilities, and we can walk you through tuning your machine to fit your exact needs, no matter what you’re welding. If you’re ready to chat about your welding challenges or want to learn more about our line of spot welding machines, reach out to our team to connect. We’re happy to answer questions, share more tips, and help you get consistent, high-quality welds every time.
Induction Heating Machine References:
- Lincoln Electric. (2020). Spot Welding Parameter Adjustment Guide. Available from manufacturer technical documentation.
- American Welding Society. (2018). Principles of Resistance Welding for Fabricators. AWS D1.1 Structural Welding Code.
- Miller Welders. (2021). Troubleshooting and Adjusting Resistance Spot Welding Parameters. Online technical resource.
- ESAB. (2019). Material-Specific Resistance Welding Guidelines for Mild Steel, Stainless, and Aluminum. Industry application note.
- The Fabricator Magazine. (2022). Common Mistakes in Spot Welding: How to Tune Your Machine for Consistent Results. Published monthly industry feature.
Dongguan Huineng Welding Equipment Co., Ltd.
We are one of the most experienced spot welding machine manufacturers and suppliers in China. With a professional production team, we offer a wide range of products with superior quality. Please feel free to buy customized spot welding machine at competitive price from our factory.
Address: 530 Guantai Road, Xitou Village, Houjie Town, Dongguan City, Guangdong Province
E-mail: fengshanggang75@126.com
WebSite: https://www.huinengwelder.com/
